Energy-Efficient Home Upgrades Vancouver BC
My neighbor in North Van spent $18,000 on solar panels last year. Know what happened? His energy bills barely budged. Meanwhile, another client invested $6,000 sealing their drafty 1960s rancher and replacing ancient windows—their heating costs dropped 40% within the first winter.
Here’s what frustrates me about energy efficiency advice for Vancouver homes: most of it comes from California or Ontario, where the climate is completely different. We don’t have scorching summers requiring massive AC. We don’t have prairie winters where you need a foot of insulation everywhere. We have mild, wet winters with occasional cold snaps, and summers where opening windows handles most cooling needs.
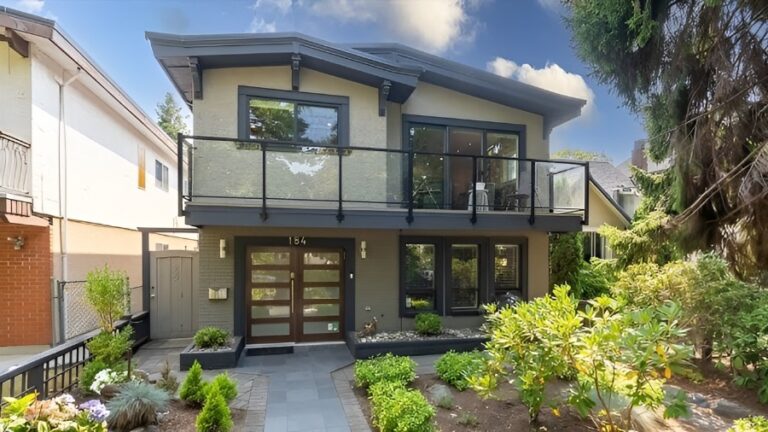
After renovating hundreds of Vancouver-area homes from Dunbar to Deep Cove, I’ve learned which energy upgrades actually make sense in our specific climate—and which ones are expensive mistakes that look good on paper but deliver disappointing results in real life. Whether you’re in a drafty 1940s Craftsman in Kitsilano, a leaky 1970s split-level in Coquitlam, or a newer townhouse in Richmond that somehow still feels cold, this guide cuts through the marketing hype to tell you what actually works.
What Energy Upgrades Actually Make Sense in Vancouver’s Climate?
Straight answer: Air sealing and insulation first (biggest bang for buck in our damp climate), then windows and doors, then heating system upgrades. Solar panels and heat pumps come last—they work here but aren’t the miracle solutions marketed to us.
Vancouver’s climate is genuinely weird compared to most of North America. We get 1,200mm of rain annually but rarely see snow. Winter temperatures hover around 3-8°C for months—not freezing, but uncomfortably damp and cold. Our homes need to handle moisture without getting moldy, maintain reasonable warmth without massive heating bills, and deal with that bone-chilling dampness that makes 5°C feel colder than -10°C in Calgary.
The moisture reality shapes everything. We can’t just pile on insulation like they do in Alberta—improper insulation in Vancouver’s climate creates condensation problems and mold. We need vapor barriers in the right places, proper ventilation to manage indoor humidity, and materials that handle moisture without deteriorating.
Air sealing matters more here than almost anywhere else. Those drafty character homes in Mount Pleasant or Grandview-Woodland aren’t just losing heat—they’re pulling in damp outdoor air that makes your home feel cold even when the thermostat says 20°C. The damp air requires more energy to heat and makes everything feel clammy.
Windows are the second-biggest energy loss in Vancouver homes, but not for the reasons most people think. It’s not just the glass—it’s the frames, the seals, and the installation quality. I’ve seen brand new windows installed poorly that leak air worse than the old ones they replaced.
Heating systems in Vancouver often run inefficiently because they’re oversized (contractors playing it safe during installation) or ancient (original equipment from the 1970s running at maybe 60% efficiency now). Modern high-efficiency furnaces or boilers can cut your gas consumption by 30-40%, but only if they’re properly sized and installed.
Here’s the priority order that actually works in Vancouver: seal air leaks throughout your home (attic, basement, around windows and doors), add insulation where it’s missing or inadequate (attic first, walls second if you’re renovating anyway), replace ancient single-pane windows, upgrade your heating system if it’s over 20 years old, add smart thermostat controls, then consider heat pumps or solar as nice-to-haves rather than essentials.
The BC Energy Step Code has changed the game for renovations. If you’re pulling permits for major work, you now need to meet minimum energy performance standards. This pushes homeowners toward upgrades they might have skipped, but it also means your renovation investment includes efficiency improvements that pay back over time.
How Much Does Air Sealing Actually Cost and Save?
Real numbers: Professional air sealing runs $1,500-3,500 for a typical Vancouver home. You’ll save 15-25% on heating costs annually. Payback period is typically 3-5 years, making it the single best energy investment for most homes.
Air sealing sounds boring compared to sexy upgrades like solar panels or smart home systems. But it’s the foundation that makes everything else work better. Think of it this way: heating a leaky house is like filling a bucket with holes—you can pour in more water (use more energy), or you can plug the holes first.
Vancouver homes leak air in predictable places: attic hatches that don’t seal properly, recessed pot lights in ceilings below attics, gaps around pipes and wires penetrating walls, gaps between foundation and framing, old windows and doors with failed weatherstripping, and electrical outlets on exterior walls. Each small leak seems insignificant, but together they add up to massive heat loss.
Professional energy auditors use blower door tests to measure exactly how leaky your home is. They pressurize the house and use thermal imaging to spot where air escapes. Most Vancouver homes built before 2000 are shockingly leaky—equivalent to having a window open several inches all winter long.
The cost breakdown for air sealing: $800-1,200 for materials (spray foam, caulking, weatherstripping, gaskets), $700-2,300 for professional labor depending on home size and accessibility. Attics are relatively easy to access and seal. Walls are harder unless you’re already renovating with walls open.
In a typical 2,000 square foot Vancouver home spending $2,400 annually on gas heating, proper air sealing typically saves $400-600 per year. That’s a 4-6 year payback, and the benefits last 15-20 years before weatherstripping needs replacement. The comfort improvement is immediate—no more cold drafts, more even temperatures throughout the house, and that damp feeling diminishes noticeably.
North Vancouver homes on the hillside often have worse air leakage because of how they’re built into slopes. Lots of penetrations through the foundation, complex rooflines, and older construction standards mean these homes benefit enormously from professional sealing.
One detail that surprises people: air sealing actually improves indoor air quality when done right. Sounds counterintuitive—isn’t fresh air good? But uncontrolled drafts pull in damp outdoor air, dust, and pollutants. Proper air sealing combined with controlled ventilation (bathroom fans, kitchen hood, HRV if needed) gives you better air quality with less energy waste.
The DIY potential is real for air sealing. Homeowners can caulk around windows, add weatherstripping to doors, install outlet gaskets, and seal attic penetrations themselves for maybe $200-400 in materials. You’ll get 60-70% of the benefit professionals deliver. But professionals have spray foam equipment and thermal cameras that find leaks you’d miss, so they’re worth it if budget allows.
Should I Replace My Windows or Just Upgrade Them?
Honest answer: If your windows are pre-1980s single-pane, replace them—the energy savings justify the cost within 10-15 years. If they’re 1990s-2000s double-pane but drafty, often fixing seals and weatherstripping gives you 70% of the benefit at 10% of replacement cost.
Window replacement is the single most oversold energy upgrade in Vancouver. Every second TV commercial shows beautiful new windows promising massive energy savings. The reality is more nuanced—new windows help significantly if your current windows are truly terrible, but the payback period is long.
Let’s talk actual costs. Replacing windows in a typical Vancouver home (15-20 windows) runs $12,000-25,000 depending on window quality, size, and whether you’re doing heritage restoration in a character home. Budget windows from big box stores run $500-800 per window installed. Quality vinyl windows from local suppliers run $800-1,200 installed. Wood or fiberglass windows for heritage homes run $1,200-2,000+ per window.
The energy savings don’t justify costs purely on financial return. Replacing old single-pane windows with modern double-pane low-E windows in that same 2,000 square foot home might save $300-500 annually on heating. At $18,000 for mid-range windows, you’re looking at 35-60 year payback. That doesn’t make financial sense.
But here’s what the pure math misses: comfort, reduced condensation, less outside noise, increased home value, and the ability to actually use rooms that were previously too cold or drafty. That sunroom facing the North Shore mountains becomes usable in winter. The bedroom above the garage stops being an icebox. These quality-of-life improvements have real value even if the energy calculator says the payback is long.
Vancouver’s moisture creates specific window problems. Old aluminum frame windows from the 1970s-80s sweat condensation badly, leading to water damage on sills, mold growth, and deteriorating window frames. Modern windows with thermal breaks and better seals eliminate most condensation issues. For moisture-prone Vancouver homes, this alone justifies window replacement.
Character homes in neighborhoods like Dunbar, Kerrisdale, or Strathcona require special consideration. The Heritage Group often requires maintaining original window appearance, which means pricey wood windows with modern insulating glass. Budget $2,000-3,000 per window for these projects. But the alternative—leaving single-pane windows in beautiful heritage homes—means astronomical heating bills and uncomfortable rooms.
Here’s my practical recommendation: if your windows are pre-1980 single-pane, replace them as budget allows. Start with north-facing windows and the coldest rooms—you’ll feel improvement immediately. If you have 1990s+ double-pane windows that just feel drafty, try this first: replace weatherstripping ($5-10 per window), adjust or replace window locks so they compress seals properly (free to $50), and add plastic film insulation kits on coldest windows in winter ($3 per window). This often solves 70% of draft problems for under $300 total.
The window quality debate is real. Cheap vinyl windows work fine in Vancouver’s mild climate—they don’t face the expansion/contraction stress of extreme temperatures. But cheap windows have thinner frames, worse hardware that fails sooner, and foam insulation instead of fiberglass in frames (fiberglass drains moisture better). Spending the extra $200-400 per window for quality products from companies like Loewen, Milgard, or Westeck pays off in longevity.
What’s the Truth About Insulation in Vancouver Homes?
Bottom line: Attic insulation to R-50+ is essential and pays back in 5-8 years. Wall insulation helps but only makes sense when you’re already renovating with walls open. Basement insulation matters more than most people realize—concrete foundations suck heat out of your home constantly.
Vancouver’s climate means we need less insulation than prairie provinces but more than California. The building code evolved over decades, so homes built in different eras have wildly different insulation levels. Pre-1960s homes often have almost no insulation. 1970s-80s homes have some but not enough. Post-2000 homes generally meet decent standards.
Attic insulation is the no-brainer upgrade. Heat rises, your attic is accessible, and adding insulation is relatively cheap and easy. Most Vancouver homes should have R-50 to R-60 in attics (about 14-16 inches of blown fiberglass or cellulose). Many older homes have R-20 or less—sometimes just R-12 if they’re from the 1960s.
The cost for attic insulation: $1,500-3,000 for a typical home, depending on attic size and access difficulty. You’ll save $250-450 annually on heating in an under-insulated home. That’s a 4-8 year payback, and the insulation lasts 30+ years. Plus your second floor stops being sweltering in summer and freezing in winter.
Wall insulation is more complicated. If your walls are closed up, adding insulation means either dense-pack blown insulation through small holes (works but limited effectiveness) or full gut renovation (expensive but lets you insulate properly). For most homeowners, wall insulation only makes sense when you’re already renovating—kitchen reno, bathroom addition, or major update with walls open anyway.
That said, if you live in a 1940s home in Mount Pleasant with zero wall insulation and you’re planning to stay 15+ years, gutting and properly insulating walls can be life-changing. I’ve seen homes go from $4,000 annual heating costs to $2,000 just from proper wall insulation combined with air sealing.
Basement insulation gets overlooked constantly. That concrete foundation wall stays around 8-10°C year-round—below your desired indoor temperature. It’s a massive heat sink pulling warmth out of your home. Insulating basement walls (interior is easier, exterior is more effective but requires excavation) reduces heat loss significantly and makes basements actually comfortable.
The moisture challenge with insulation is real in Vancouver. You can’t just stuff fiberglass batts in walls and call it done—moisture from our humid climate can condense inside walls, creating mold and rot. Proper insulation requires vapor barriers on the warm side, ventilation gaps where needed, and materials that handle moisture. This is why DIY insulation often creates problems rather than solving them.
Specific insulation materials that work well in Vancouver: blown cellulose or fiberglass for attics (breathable, handles moisture well), closed-cell spray foam for basements and crawlspaces (moisture barrier plus insulation), mineral wool batts for walls (doesn’t hold moisture, fire-resistant), and rigid foam boards for basement walls (easy to install, moisture-resistant).
The BC Energy Step Code now pushes higher insulation standards when you’re doing major renovations. If you’re pulling permits, you’ll need to meet minimum performance levels—often this means upgrading insulation beyond what you’d planned. It adds cost upfront but improves long-term performance and resale value.
Are Heat Pumps Actually Worth It in Vancouver?
Real talk: Heat pumps work well in Vancouver’s mild climate and can cut heating costs 30-50% compared to electric baseboards or old oil furnaces. But if you have newer gas heating, the savings are smaller and payback takes 15-20 years. They’re great for new builds or major renovations, less compelling as simple retrofits.
Heat pumps have become the darling of energy efficiency advocates, and honestly, they work great in Vancouver’s climate. We don’t get the deep freezes that make heat pumps struggle (they lose efficiency below -10°C). Our mild winters are exactly where heat pumps shine.
The technology is simple: they move heat rather than create it, making them 2-3 times more efficient than electric resistance heating. In summer, they work like air conditioners (moving heat out). In winter, they extract heat from outdoor air and move it inside. Even at 0°C outside, modern heat pumps can pull heat from the air efficiently.
Cost reality: a whole-home heat pump system (ducted mini-split or central heat pump) runs $12,000-25,000 installed depending on home size and system quality. Ductless mini-splits (wall-mounted units) run $3,000-6,000 per zone. If you already have ductwork from existing forced air heating, retrofitting a central heat pump is easier and cheaper than starting from scratch.
The savings depend entirely on what you’re replacing. Replacing electric baseboard heat? You’ll save 50-65% on heating costs—massive savings that pay back the heat pump in 8-12 years. Replacing an ancient oil furnace? Similar savings. But replacing a relatively efficient natural gas furnace? You might save 15-25%, which means 18-25 year payback. That’s a tough financial case.
BC Hydro and the federal government offer rebates for heat pump installations—up to $6,000-11,000 combined depending on the system and your income level. These rebates dramatically improve the financial case, shortening payback to 6-10 years even when replacing gas heating.
Heat pumps provide air conditioning as a bonus—something increasingly valuable with Vancouver’s hotter summers (remember June 2021’s heat dome?). If you were considering adding AC anyway, a heat pump delivers both heating and cooling, making the investment more compelling.
The noise factor surprises people. Outdoor units make noticeable sound—not loud but constant when running. In dense Vancouver neighborhoods with houses close together, this can create neighbor issues if the unit is poorly placed. North Vancouver hillside homes often have better placement options because properties are larger.
Cold snap backup matters. When temperatures drop below -5°C (rare but happens most winters for a few days), heat pump efficiency drops. Many systems have electric resistance backup heat that kicks in, but it’s expensive to run. Keeping your existing gas furnace as backup is smart if you have it—use the heat pump most of winter, switch to gas during the coldest snaps.
Ductless mini-splits work great for zone heating. Have a cold basement suite in your Burnaby home? One mini-split unit heats it efficiently without upgrading your whole house. Have a cold addition on your Richmond rancher? Mini-splits are often cheaper than extending ductwork. This targeted approach often makes more financial sense than whole-home systems.
Does Solar Make Sense on Vancouver Homes?
Unfiltered truth: Solar panels work in Vancouver despite our reputation for rain—we get decent sun exposure, especially in summer. But BC Hydro rates are among the cheapest in North America, so payback periods are long (20-25 years). Solar makes sense if you’re environmentally motivated or think electricity prices will rise sharply. It’s not a money-maker here like it is in California.
Let’s bust the biggest myth: Vancouver gets enough sunshine for solar to work. We get about 1,920 hours of sunshine annually—obviously less than Arizona, but comparable to Seattle, Portland, or even parts of Germany where solar is huge. The rain is mostly fall and winter when solar production is lower anyway. Summer gives us long days with excellent solar potential.
The cost reality: a 5kW solar system (about 15 panels, typical for a Vancouver home) runs $13,000-18,000 installed. Federal rebates can reduce this by $5,000-7,000, bringing net cost to $8,000-13,000. That system will generate about 5,000-6,000 kWh annually in Vancouver.
Here’s where the math gets disappointing: BC Hydro charges roughly $0.13/kWh for electricity. Your 5,000 kWh solar production saves you about $650 per year. At $10,000 net cost after rebates, you’re looking at a 15-20 year payback. Solar panels last 25-30 years, so you will eventually get your money back—but it’s a long wait.
Compare this to California where electricity costs $0.30-0.40/kWh and solar pays back in 6-8 years. Or Ontario where rates hit $0.20/kWh off-peak and higher during peak times. Vancouver’s cheap hydro-electric power makes solar less financially compelling than almost anywhere else in North America.
The environmental case is more complex than advocates admit. BC’s electricity grid is already 98% renewable (mostly hydro with some wind). Installing solar panels doesn’t reduce fossil fuel consumption the way it does in Alberta or the US. You’re replacing clean hydro with clean solar—environmentally neutral. The manufacturing footprint of solar panels is significant, so the environmental case isn’t as strong as it seems.
Net metering in BC lets you sell excess production back to the grid at retail rates, which helps. Summer solar production exceeds your usage, so you bank credits. Winter production is low, so you draw from the grid. Over the year, it balances out reasonably well in Vancouver’s climate.
South-facing roofs are essential for good solar production. That beautiful heritage home in Kerrisdale with its complex roofline and north-facing orientation? Solar won’t work well. But that 1970s split-level in Coquitlam with a simple south-facing roof? Perfect candidate. Roof pitch matters too—Vancouver’s ideal pitch is about 30 degrees for year-round production.
Battery storage adds another $12,000-18,000 to solar installations. It lets you store daytime production for evening use and provides backup power during outages. But financially, batteries make the payback even longer—we’re talking 25-30 years now. Unless you experience frequent power outages or really value energy independence, batteries don’t make economic sense in Vancouver yet.
Here’s my honest take: install solar if you care deeply about environmental impact, plan to stay in your home 20+ years, have an ideal south-facing roof, and can afford the upfront cost without financial stress. Don’t install solar if you’re doing it purely for economics—the payback in Vancouver is too long to be a smart investment compared to other energy upgrades.
What About Smart Thermostats and Lighting Upgrades?
Quick answer: Smart thermostats (Nest, Ecobee) cost $250-400 installed and typically save 10-15% on heating/cooling—payback in 2-3 years. LED lighting upgrades are no-brainers: $3-8 per bulb, saves 75% over incandescent, pays back in under a year. Do both immediately.
Smart thermostats are genuinely useful, not just tech hype. They learn your schedule, adjust temperatures automatically when you’re away, and let you control heating remotely. For Vancouver’s variable weather where you might need heat in the morning but not by afternoon, this flexibility saves energy without sacrificing comfort.
Ecobee and Nest are the two main players. Both work well in Vancouver homes with forced air or hydronic heating. Installation is DIY-friendly if you’re somewhat handy, or HVAC contractors charge $100-150 for professional installation. The thermostats pay for themselves within 2-3 years through reduced heating and cooling costs.
The room sensor feature matters in Vancouver homes. Many of our houses have uneven heating—basements cold, upstairs hot, south rooms sunny while north rooms freeze. Smart thermostats with remote sensors (Ecobee includes them, Nest sells separately) let you balance temperature across multiple zones, improving comfort and efficiency.
LED lighting has reached the point where there’s zero reason not to upgrade. LEDs cost a few dollars per bulb, last 15-25 years, use 75% less energy than incandescent bulbs, and produce way less heat (which matters in summer). Replace every bulb in your house for $150-300 total, save $100-200 per year on electricity, and never buy bulbs again for a decade.
Dimmable LEDs work great for Vancouver’s gray days when you want adjustable lighting. Smart LED bulbs (Philips Hue, LIFX) cost more ($15-30 each) but let you control brightness and color temperature remotely—useful for mood lighting or simulating sunshine on dreary February afternoons.
Motion sensor lighting for outdoor areas makes sense in Vancouver. We have long dark winters (sunset at 4:30 PM in December), so motion-activated LED floods for driveways, walkways, and entrances improve safety while only running when needed. Solar-powered motion lights work surprisingly well even in Vancouver—they charge during daytime and provide adequate lighting at night.
How Do I Prioritize Energy Upgrades on a Budget?
Priority order: Air seal first ($1,500-3,500), attic insulation second ($1,500-3,000), smart thermostat third ($250-400), LED bulbs fourth ($150-300), then windows if you have budget. This $3,500-7,000 investment delivers 25-35% energy savings—far better return than expensive heat pumps or solar panels.
Most homeowners want to do everything at once, realize it costs $50,000+, then do nothing. That’s the wrong approach. Energy upgrades deliver diminishing returns—the first few improvements deliver huge savings, additional upgrades bring smaller incremental benefits.
Start with air sealing and attic insulation because they’re cheap relative to savings and work immediately. Spend $4,000-6,000 on both and you’ll cut heating bills by 20-30% that first winter. The comfort improvement is immediate and dramatic—no more cold drafts, more even temperatures throughout the house, and fewer heating cycles.
Add a smart thermostat next because it optimizes whatever heating system you have. That $300 investment pays back in 2-3 years through better temperature management and reduced energy waste. It also gives you data on how much energy you’re using, which informs future upgrade decisions.
Replace all bulbs with LEDs because it’s cheap, easy, and saves money immediately. Spend a Saturday afternoon and $200 on bulbs and you’re done—saving money every single month for the next 15 years with zero maintenance.
Then assess windows. If they’re ancient single-pane, replace them over 2-3 years as budget allows. Start with the coldest rooms and north-facing windows where you’ll feel improvement most. If windows are okay but drafty, weatherstrip them for $50-100—massive improvement at almost no cost.
Only after all this should you consider heat pumps, solar, or major HVAC upgrades. These expensive upgrades work better in already-efficient homes. Installing a heat pump in a leaky, poorly-insulated house means the heat pump runs constantly trying to overcome poor building envelope—wasting money and not delivering promised savings.
The renovation opportunity matters enormously. If you’re already doing a kitchen or bathroom renovation with walls open, add insulation then—it’s cheap when walls are already exposed. If you’re already replacing siding, add exterior insulation at the same time. Piggyback energy upgrades onto planned renovations to save money.
BC Hydro and FortisBC offer rebates for energy assessments ($150 for a full home energy audit). Having a professional assess your home with thermal imaging and blower door testing tells you exactly where you’re losing energy. They’ll prioritize upgrades specific to your home, which is more valuable than generic advice. The $150 cost is worth it if you’re planning $5,000+ in upgrades.
The Real Path to Energy Efficiency in Vancouver
Energy efficiency in Vancouver isn’t about chasing the latest technology or installing solar panels to feel good. It’s about understanding our specific climate—damp, mild, with long gray winters—and making practical upgrades that deliver real comfort improvements and financial savings.
Start with boring but effective basics: seal air leaks, insulate your attic, replace awful windows, upgrade ancient heating systems. These aren’t sexy, but they work. They make your home comfortable, reduce energy bills noticeably, and pay for themselves within a reasonable timeframe.
Then, if budget allows and you’re committed to staying in your home long-term, explore heat pumps or solar. But be realistic about payback periods in Vancouver’s unique situation—cheap hydro electricity and mild climate mean these advanced upgrades take decades to pay off financially. That’s okay if you value environmental impact or energy independence, but don’t fool yourself about the economics.
Whether you’re in a drafty character home in Point Grey, a 1970s rancher in North Van, or a newer townhouse in Richmond, the right energy upgrades transform your home from money pit to comfortable, efficient space that costs less to operate year after year.
What energy upgrades have you done? What actually worked, and what was disappointing?
Ready to Make Your Vancouver Home More Comfortable and Efficient?
Walker General Contractors specializes in energy-efficient renovations that work in BC’s coastal climate. We handle everything from air sealing and insulation to full energy-focused renovations—and we know exactly which upgrades deliver real value in Vancouver.
📍 409-1330 Marine Drive, North Vancouver, BC V7P1T4
📧 info@walkergeneralcontractors.ca
📞 604.781.7785
[Book Your Energy Consultation] — We’ll assess your home, identify the biggest energy losses, and create a prioritized upgrade plan that fits your budget and delivers real results.
About the Author: walkergc
Related Posts